Social Icons

Showing posts with label purple. Show all posts

5 November 2012

Cosmic Constellation Bead Nails


This tutorial shows how to use nail art beads to create this purple constellation design :)

1)

For this design you will need a clear topcoat, a purple varnish and some nail art beads. I used Barry M#303 bright Purple and the beads are MUA Nail Constellation in Leo which comes in a shaker pot for easy use.

2)

Begin by painting all of your nails with your purple shade.

3)


Next, paint a coat of your clear varnish on your accent nail.

4)

Then drop some of your nail beads all over your accent nail; the one I used had a shaker which made it pretty easy, but if you just have loose beads you can put them in a cup and just pour them over.

5)


Press the beads down so there is an even layer, then repeat this on your thumb nail.

And this is the finished cosmic constellation nail bead design :)


22 October 2012

Spider Web Nails


This is my purple spider web manicure nail tutorial; two webbed accent nails and a gothic french tip style give a shiny, spooky design perfect for Halloween :)

1)

For this design you only need two colours; a dark shade and a shiny silver polish. You can choose any dark colour you like; navy, black, purple etc - I used purple. The products I used are Barry M #303 Bright Purple and MUA #11. 

2)

Begin by painting all your nails with your dark polish.

3)

To start the web design, carefully paint three thin lines on your thumb nail with your silver polish. The lines should spread out diagonally from the bottom outside corner of your thumb nail.

4)


Next, again using your silver varnish, carefully paint these slightly curved webs in-between each of your diagonal lines close to the top of these lines. If you find your brush too thick you can use a toothpick instead.


5)

To finish off the web design add another two rows of webbing across your diagonal lines. The bottom two should be closer together than the top two.

6)

Repeat these steps on your accent nail to finish off the web part of this tutorial; this accent nail should only have two lines of webbing across as the dimensions of the nail means it'd be too cramped to have three.

7)

The final step in this design is to add the silver french tips to your remaining purple/dark nails; to create a smooth line try rolling your nail slightly toward your brush as you paint.

And this is the finished shiny spider web nail art design :)


31 August 2012

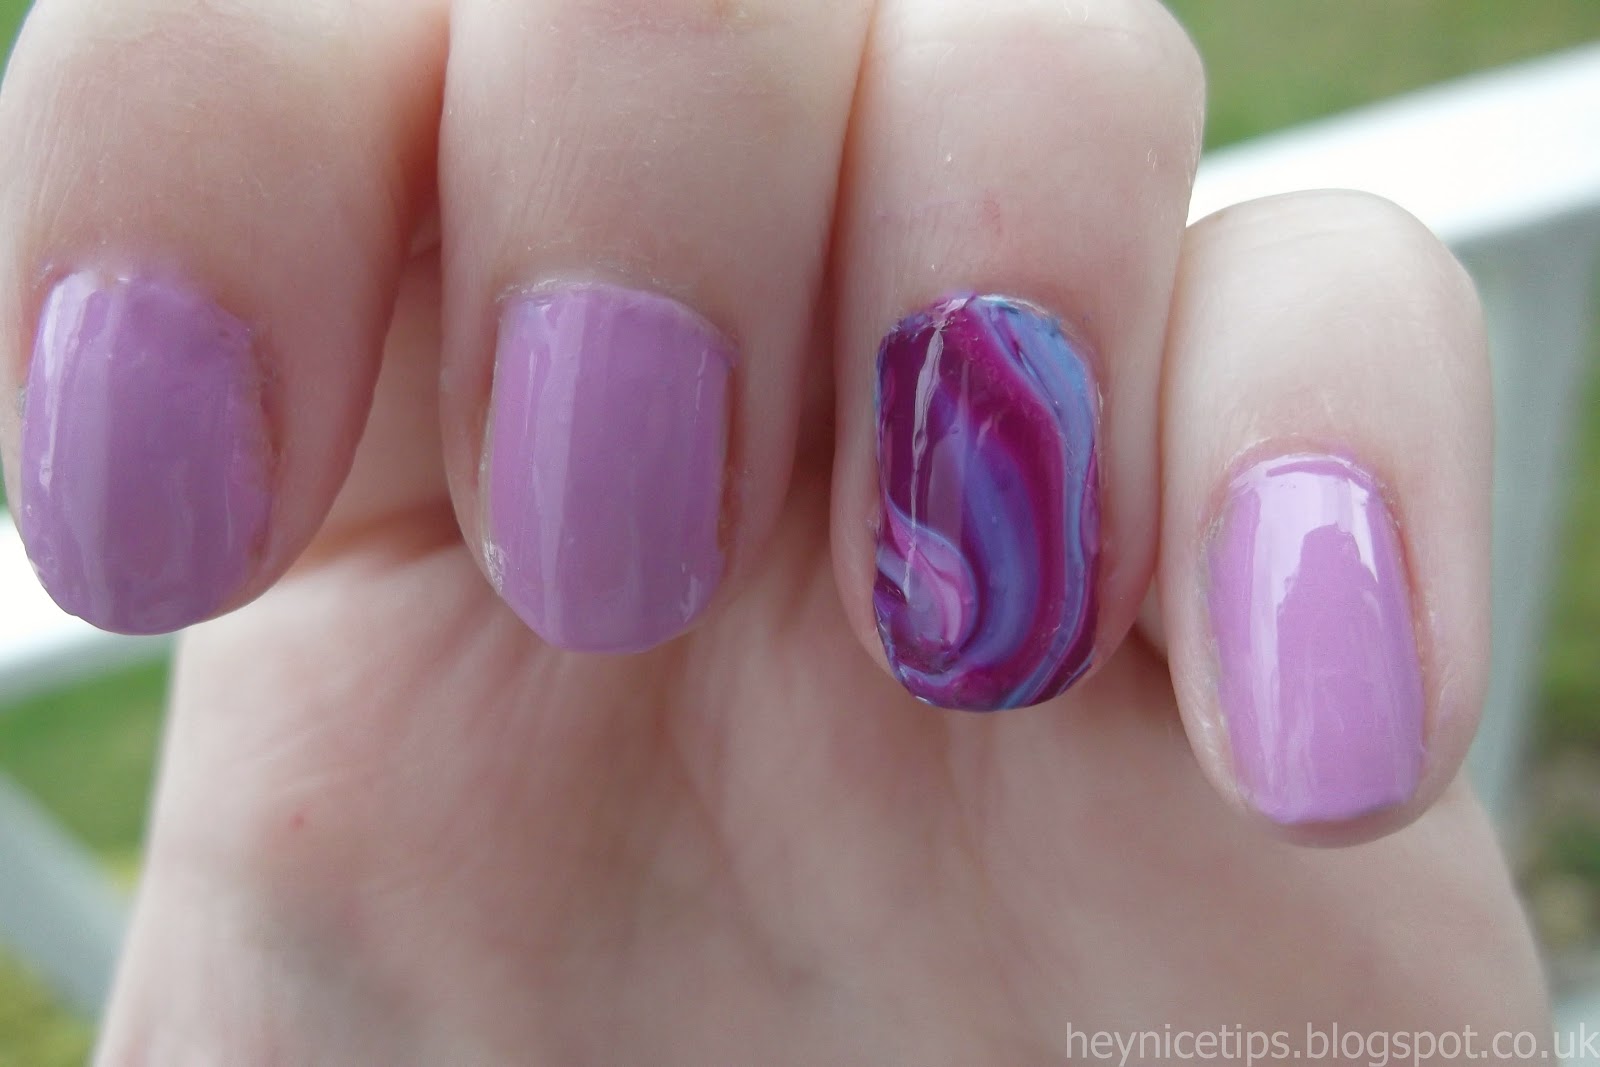
Purple Marble Nail Art


This nail tutorial shows how to use the water marbling technique to create this purple marble effect nail art :)

1)

For this design you will need three colours; lilac/light pink, light blue and purple. I used Barry M #308 Berry Ice Cream, #306 Blueberry Ice Cream and #303 Bright Purple. NB: I initially tried a cheaper brand (MUA) of polish but it just sunk straight to the bottom of the water, so I recommend a brand like Barry M for this one!

2)

The first step is to get a container like this, or a cup/bowl, and add some water to it, it doesn't need to be very deep.

3)

Then pour a blob of your purple shade straight onto the water (just a small amount will do as it spreads by itself), then add a blob of your lilac/light pink polish into the middle of the purple like the picture above.

4)

Then add a smaller blob of your light blue shade into the centre of the lilac blob.

5)

Next, take a toothpick (a pencil will also work), and carefully drag your colours outwards.

6)

You can also drag inwards to really mix them around each other.

7)

Then begin to pull the toothpick round the blob of colour in a circular motion to create a swirly  really random pattern.

8)

Carry on dragging your colours around in different directions until you get a pattern you like - this is how mine came out. This technique means that everyone's will come out differently so just try to get a design you like :)

9)

Paint two thin coats of your lilac shade on all your nails and allow to dry.

10)

Take three pieces of tape and cover the areas around your accent nail to stop the polish sticking to them.

11)

Next, carefully dip your accent nail onto the top of your design in the water, lift it out gently.

12)

The accent nail should now have a marbled design on it. Carefully remove the pieces of tape and use varnish remover to clean up any polish that got on your finger.

And this is the finished purple marble nail art design :)


2 August 2012

Purple Leopard Print Nail Art


This is my purple leopard print nail art tutorial, with black and purple colours and a leopard print accent and thumbnail :)


1)

For this design you will need three colours; purple, black and a lighter lilac shade (silver would also work if you don't have a lilac one).  I used Barry M #303 'Bright Purple' and MUA shade #2 and #24

2)


Start by painting your accent and thumbnail with your purple polish, and the remaining three with your black shade. 


3)


The first stage of creating the leopard print design is to paint some random kind of circular shapes on your accent nail. I did this by simply dabbing the brush flat on the nail and letting it make whatever shape came out (a few larger shapes work better than lots of small ones as it makes the next step easier). Do the same on your thumbnail. 


4)


To complete the leopard print look, take your black polish and, using the corner of your brush, carefully outline your lilac shapes but do not go all the way around them (think of 'U' and 'C' shapes rather than just circling them). Add some random tiny black dots in empty areas to add some more detail to this design. Repeat on your thumbnail.


And this is the finished leopard print nail art design :)


18 July 2012

Lilac & Mint Metallic Manicure


This is my lilac and mint metallic manicure - inspired by spring/summer 2012's pastel trend :). This is a simple design with a lilac background and a slanted mint tip, separated by a thin metallic line.  


1)


For this nail art you'll need mint, lilac and silver varnishes. The ones I used are: Saffron Glossy Mint #55, Barry M Berry Ice Cream #308 and MUA #11. 


2)


First paint two thin coats of your lilac shade onto all your nails.


3)


Now add the metallic layer; take your silver polish and using your whole brush paint a broad line diagonally across the top corner of all your nails; then fill in any bits that were missed. The very top part will be painted over in the next step so it doesn't need to be perfectly covered.


4)


Next, take your mint polish and, using the whole width of the brush, paint a broad line across the very top corner, leaving a thin line of silver visible between the mint and lilac parts. Then fill in any of the corner that was missed in order to complete the design. 


And this is the finished lilac & mint manicure :)