Social Icons

Showing posts with label yellow. Show all posts

14 July 2014

Summer Inspiration: Flamingo Gradient Nails


This tutorial is the first in my Summer Inspo collection of fun nails that are great for holidays :)
Here you'll find out how to create this cute flamingo design along with some bright yellow/pink gradient nails.

1)

You'll need a dark pink, white, light/mid pink, yellow, black and a topcoat. Here are the polishes I used (black was Barry M - not pictured!). 

2)

Start off by painting two thin coats of your yellow shade on all of your nails.

3)

Next, take your light/mid pink and paint a semi circle across the top of your accent nail. Leave a slight gap on either side for the detail next. Don't worry if your edges aren't perfect as they will be covered with a darker shade!

4)

Now you'll need to use your dark pink polish to carefully add some flamingo detail. Start by painting a thin semi-circle around your light pink 'body'. Next, paint a question mark type shape that connects to the bottom left of the semi circle. I found it easier to do some little dots at key points in the shape then join them up. Starting at the top also helps with blending any excess polish!

5)


Next, take your white polish and using a corner of the brush paint a small circle for your flamingo's eye. Then take your black shade and add a smaller dot using the same technique - if your brush is too thick or you find it tricky try using a toothpick. Add a small triangle at the end of the face for a beak.

6)


Now all you need to do is paint your gradient nails! Take a sponge (washing up/make up/any kind of sponge) and paint the gradient pattern onto it. Have the darkest pink at the top, then the mid pink and lastly the yellow. It works best if you overlap them a little.

7)
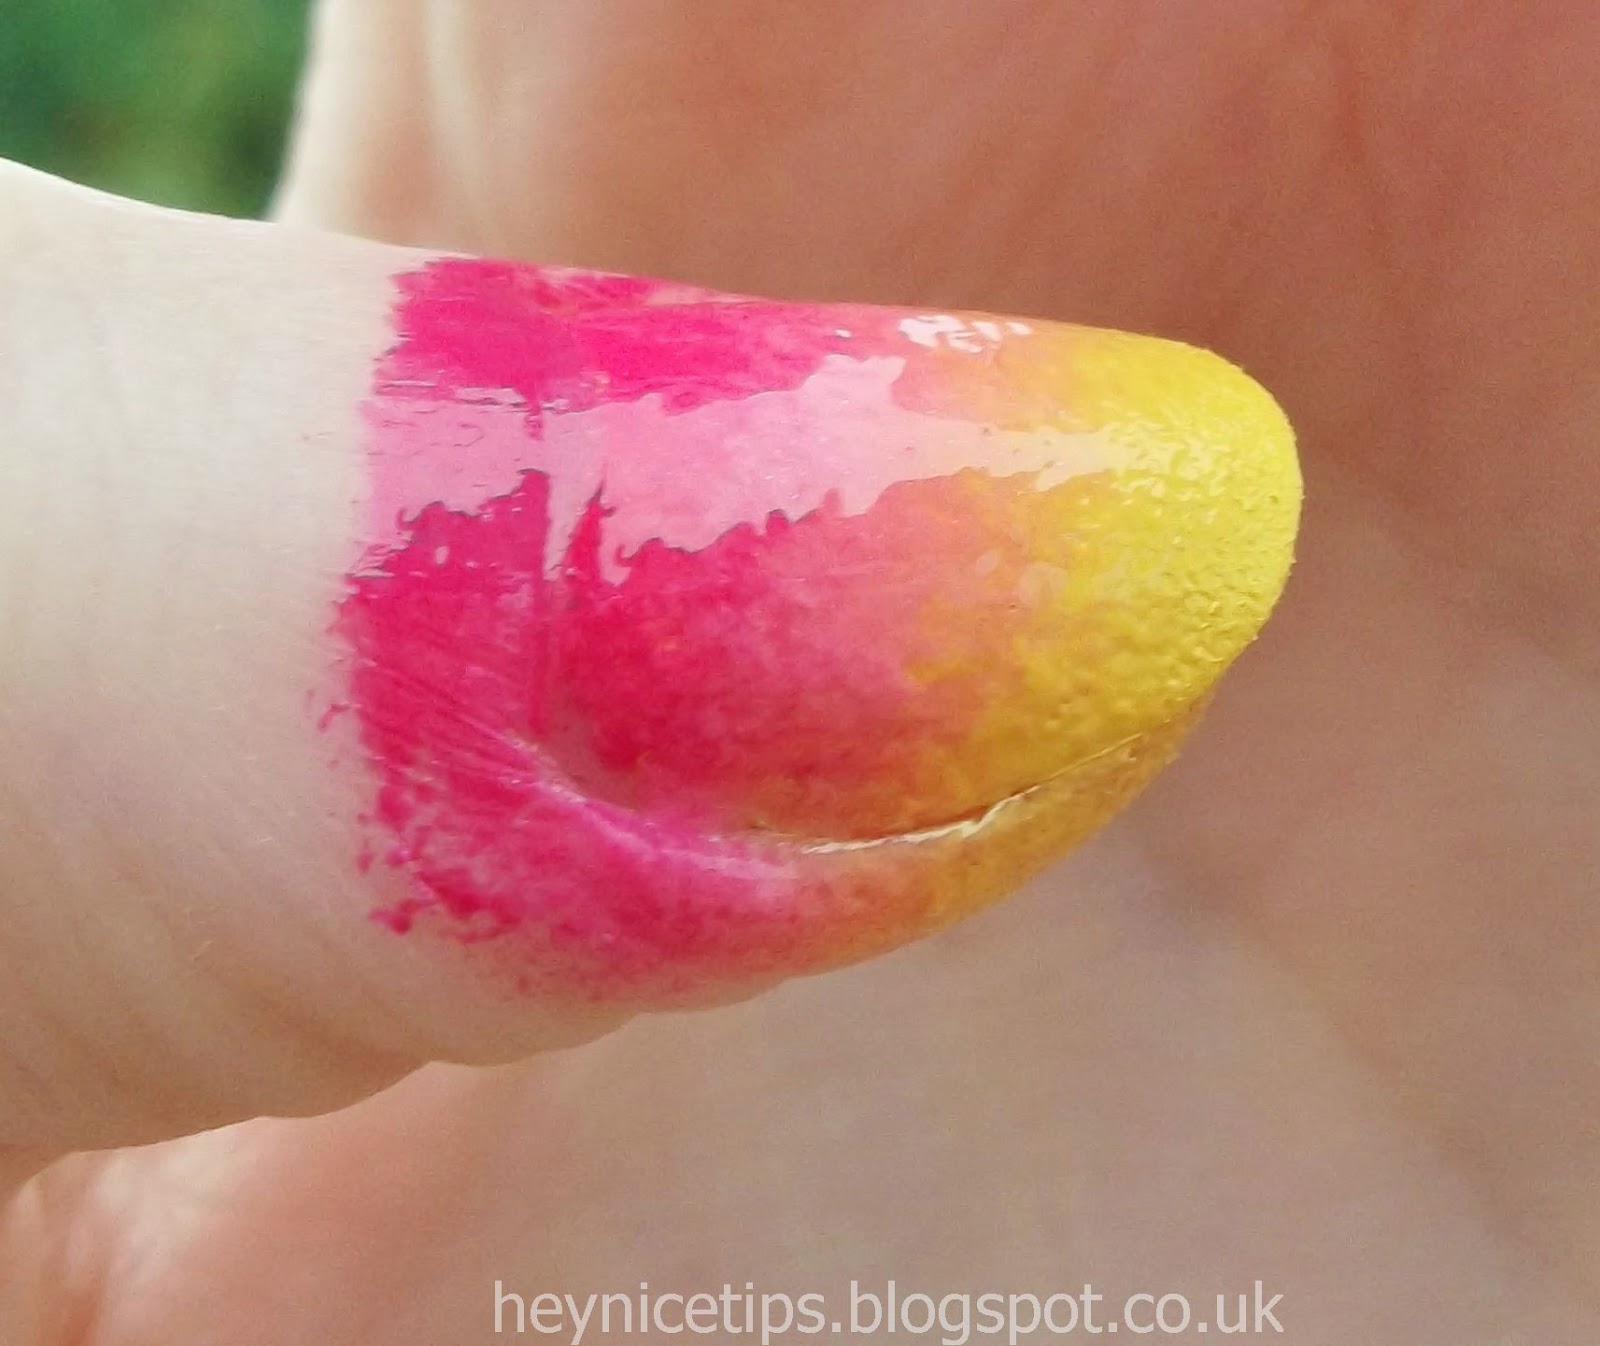

Then take the sponge and dab it onto your nail until it is properly covered with the gradient pattern. You may have to dab it a few times and this can be messy. Top up the paint on your sponge as you go to add the gradient to all your nails. Lastly use some nail varnish remover and a q-tip to clean up those edges and add a top coat if you have one.

And this is the finished Flamingo Gradient nail design :)


20 February 2014

Van Gogh Starry Night Nails


This tutorial shows you how to create this Starry Night nail look for some very arty nail art :)

You'll need: black, yellow, white and three different blue polishes

1)


Start by using your darkest blue polish and paint all of your nails, do two coats on the first four and one on your little finger nail as this one should be slightly lighter.

2)


Next, use your white polish and add some dashes across all your nails, try to make it swirly on the bigger nails

3)


Then use your lightest blue polish and add some more dashes amongst the white ones

4)


Add some white splodges for the first part of the stars and use your middle-tone blue to add some dashes all over your nails.

5)


Then use your yellow polish to add some colour to the stars. The little finger nail has a crescent moon on to match the right side of the painting :)

6)


Then you need to paint the cypress on the left of the painting; take your black polish and paint a thick, curved line up your nail. Then gradually add to it one each side to create the full shape


7)

Add some yellow dashes amongst the white ones to create some starlight :)

8)

Add any more light blue or white dashes that you think your nails need to give them the Starry Night look :)


And this is the finished Starry Night nail art design :)


Piet Mondrian Composition Nails


This tutorial is inspired by Piet Mondrian's Composition II in Red, Blue and Yellow and is something a little bit different with bold primary colours )

1)


You will need a five colours: black, yellow, white, blue and red. I used Barry M Black #47 (not pictured!) Nail Star Yellow, Barry M  Matt White #66,  Rimmel #198 Azure and Ciate Boudoir 


2)

The first thing to do is paint two thin coats of your white polish on all of your nails.

3)


Next, use your black polish and carefully paint some vertical and horizontal lines. They key to this look is not always going fully across the nail, so that the squares become a bit disjointed (sorry the picture came out blurry!)

4)


Next, fill in some of the squares with your red, yellow and black polishes. They can be adjacent but make sure to leave some squares white :)

5)

Then paint some different black outlines on the rest of your nails, and colour in with your red, blue, yellow and black polishes as in step 4. The grid can be however you like with more/less squares than mine depending on your nail size. 

And this is the finished Piet Mondrian inspired nail art :) 


19 February 2013

Disney Character Nails


This tutorial shows how to create this abstract Disney character design. It features nails that represent Mickey Mouse, Goofy, Donald, Minnie and Pluto :)

1)

For this design you'll need quite a few colours! You'll need: black, red, orange, white, blue, nude, yellow and green. I used (l-r) Barry M #47 Black, Collection #5 Fire Engine, Max Factor #25 Bright Orange, Collection #103 French White, Barry M #306 Blueberry Ice Cream, Barry M #342 Nude and the yellow and green are from a nail art set

2)

The first step is to paint your little finger nail yellow, your middle finger nail white and the remaining three with your nude polish.

3)

For the Pluto nail (little finger), paint one thick black stripe across the base of your nail, then paint a thin black stripe across the centre. Next, take your green varnish and paint a thick french tip across the top of your nail.

4)

For the Minnie Mouse nail (accent nail), first paint a really thick red french tip across the top of your nail, then paint a red stripe across the base of your nail. Then, take your black varnish and paint a slightly thinner stripe below that red one. 

5)

Next, take your white varnish and carefully paint lots of random polka dots on your ride sections to complete Minnie's bow and dress detail.

6)

Now for the Donald Duck nail (middle nail), take your blue shade and paint a thick french tip across the top of your nail. Then paint another blue line across the base of your nail. 

7)

Next, use your yellow shade to paint a thin line across the centre of your nail to represent his beak. Then use your red varnish to paint a short line across the end of your nail to represent his bow tie.

8)

For the Gooofy nail (index finger), first use your green polish to paint a line across the base of your nail to represent his hat. Next, take your orange shade and paint just under 1/2 of the top of your nail for his shirt.

9)

To complete the Goofy nail, simply use your black polish to carefully paint a thin black line underneath your green line to represent his hair line. 

10)

The last part of this design is the Mickey mouse nail: on your thumb nail, use your red varnish to paint the top half of your nail. Next, take your black varnish and paint a brush-width line across the base of your nail.

11)

Finally, use your yellow varnish to paint two ovals in the centre of the red section as his trouser buttons. 

And this is the finished disney character nail art design :) 


15 October 2012

Candy Corn Pumpkin Nails


This is my Halloween themed pumpkin and candy corn nail art; two pumpkins and three candy corn stripe nails create a fun Halloween tutorial :)

1)

For this design you will need five colours; orange, black, white, yellow and dark green. I used (l-r) 2True shade #27, MUA shade #2, MUA 'All Nude' and the last two are from a Nail Star set.

2)

Begin by painting your accent and thumb nails with your orange shade, then paint the remaining three with your white varnish. 

3)

The first part of the pumpkin design is to paint the leaves at the top of your nails; using your dark green varnish, carefully paint three small lines at the top of your nail like in the picture.

4)

Next you need to paint the pumpkin eyes; using your black varnish carefully paint two small triangles in the top half of your nail; start with the bottom line, then paint two diagonal strokes upwards to create a hollow triangle, then fill the gap. 

5)

Then using your black polish again, paint this zig zag line for the mouth; be careful not to have too much varnish on your brush to avoid the pattern becoming too thick. You can also use a toothpick instead if your brush is too wide for this pattern. 

6)


Repeat this on your thumbnail so that you have two pumpkins :)

7)

Next using broad, flat strokes paint your yellow and orange candy corn stripe. Paint the yellow first, then the orange, as the yellow will not cover the orange shade and could look a little messy if they overlap at all.

And this is the finished Halloween candy corn pumpkin nail design: