Social Icons

31 August 2012

Purple Marble Nail Art


This nail tutorial shows how to use the water marbling technique to create this purple marble effect nail art :)

1)

For this design you will need three colours; lilac/light pink, light blue and purple. I used Barry M #308 Berry Ice Cream, #306 Blueberry Ice Cream and #303 Bright Purple. NB: I initially tried a cheaper brand (MUA) of polish but it just sunk straight to the bottom of the water, so I recommend a brand like Barry M for this one!

2)

The first step is to get a container like this, or a cup/bowl, and add some water to it, it doesn't need to be very deep.

3)

Then pour a blob of your purple shade straight onto the water (just a small amount will do as it spreads by itself), then add a blob of your lilac/light pink polish into the middle of the purple like the picture above.

4)

Then add a smaller blob of your light blue shade into the centre of the lilac blob.

5)

Next, take a toothpick (a pencil will also work), and carefully drag your colours outwards.

6)

You can also drag inwards to really mix them around each other.

7)

Then begin to pull the toothpick round the blob of colour in a circular motion to create a swirly  really random pattern.

8)

Carry on dragging your colours around in different directions until you get a pattern you like - this is how mine came out. This technique means that everyone's will come out differently so just try to get a design you like :)

9)

Paint two thin coats of your lilac shade on all your nails and allow to dry.

10)

Take three pieces of tape and cover the areas around your accent nail to stop the polish sticking to them.

11)

Next, carefully dip your accent nail onto the top of your design in the water, lift it out gently.

12)

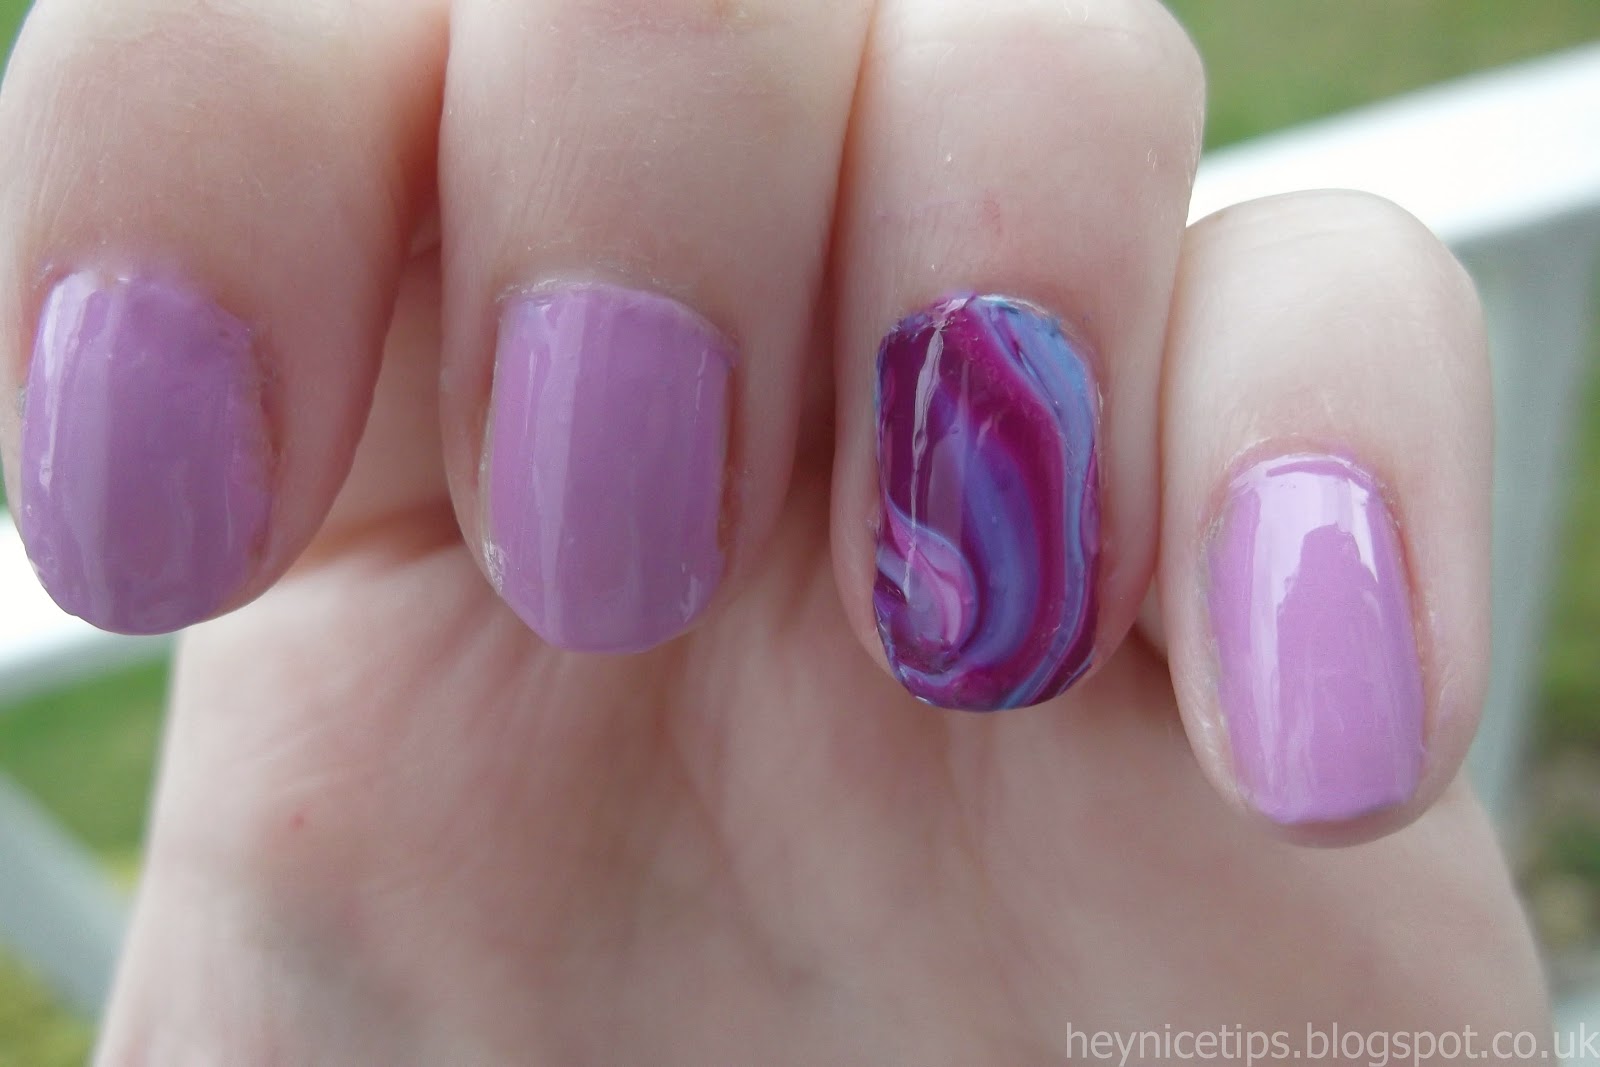
The accent nail should now have a marbled design on it. Carefully remove the pieces of tape and use varnish remover to clean up any polish that got on your finger.

And this is the finished purple marble nail art design :)


29 August 2012

Breaking Bad Nail Art


This is a nail art tutorial based on one of my favourite TV shows; Breaking Bad. It features the Br Ba logo on the thumbnail, Heisenberg/Walter White on the accent nail and the remaining nails are sparkly blue to represent their 'product' Blue Sky :)

1)

For this nail art you will need five varnishes; a dark green, black, white, clear/pale glitter and light blue. My first three are from a Nail Star set, then I have used Barry M #264 Pink Iridescent and Barry M#306 Blueberry Ice Cream.

2)

Start by painting your thumbnail dark green, your accent nail white and the remaining three nails with your light blue shade. Using two thin coats usually works best.

3)

The first stage of this nail art is to create the 'Blue Sky' design; do this by painting two coats of your glitter polish on top of the blue nails, the more glitter the better :)

4)

The thumbnail is probably the most tricky part of this nail art; begin by using your white shade to carefully paint the first 'B' in the top left corner of your nail - if you find using the brush is difficult, try using a toothpick instead.


5)

Again using your white polish, add a lower-case 'r' next to the first 'B'. Then paint another 'B' just below and right of the 'r'. 

6)

The lower-case 'a' is probably the most difficult letter; start by painting the top curved part and bring the line straight downwards, then add the circular/loop part of the letter. 

7)

The final stage of the Breaking Bad design is the infamous Heisenberg poster; begin by using your black polish and paint a line about 2/3 up your nail, as in the first picture (sorry for the bad quality!). Next, add the square on top of your line to create his hat, then paint another line about half way up your nail. 

8)

Next, add two semicircles underneath your line to create his sunglasses.

9)

To finish the Heisenberg design add a curved black line beneath the sunglasses to create the moustache :)

And this is the finished Breaking Bad nail art design :) 


2 August 2012

Purple Leopard Print Nail Art


This is my purple leopard print nail art tutorial, with black and purple colours and a leopard print accent and thumbnail :)


1)

For this design you will need three colours; purple, black and a lighter lilac shade (silver would also work if you don't have a lilac one).  I used Barry M #303 'Bright Purple' and MUA shade #2 and #24

2)


Start by painting your accent and thumbnail with your purple polish, and the remaining three with your black shade. 


3)


The first stage of creating the leopard print design is to paint some random kind of circular shapes on your accent nail. I did this by simply dabbing the brush flat on the nail and letting it make whatever shape came out (a few larger shapes work better than lots of small ones as it makes the next step easier). Do the same on your thumbnail. 


4)


To complete the leopard print look, take your black polish and, using the corner of your brush, carefully outline your lilac shapes but do not go all the way around them (think of 'U' and 'C' shapes rather than just circling them). Add some random tiny black dots in empty areas to add some more detail to this design. Repeat on your thumbnail.


And this is the finished leopard print nail art design :)